Friday, October 30, 2015

My first Feathered Star and some finishes

Seems like I haven't posted in awhile but I sure have been busy sewing. Sometimes I just feel the urge to sew like crazy and this week was one of those times. I actually ended up with several finishes, cleaned up some areas of the studio and tried out some precision piecing all while feeling a bit of a cold. And we babysat the grandchildren twice! How is it that some weeks I can get so much done and other weeks it feels like I have accomplished nothing! Anyway, first up is my first attempt at a feathered star. I followed an online tutorial on a blog, It's Molly's Place, and in one long morning made this block. I am really pleased with how it turned out and now have the confidence to try this block again in a bigger project. Careful cutting, a perfect seam allowance and slow careful stitching were all it took to get good results.

That afternoon I quilted and bound it making this cute little wall hanging.

It should complement this batik quilt, Winter Blooms, which I quilted the following day. Sadly you cannot see much of the quilting in these photos. This will be perfect hanging in my livingroom after the Christmas chaos when I am in the mood for these more serene colors.

And speaking of Christmas, I quilted and bound this Sampler Magic quilt from a pattern by Lori Smith that I made to use on my bed at Christmas. I love the non traditional colors and touches of shiny gold. Perfect to add a little bling to the holiday.

And my Mystery Gone Astray quilt is now ready to be used as a throw when I decorate the livingroom for Christmas. This quilt began it's life as a mystery quilt but after making 200 flying geese units I saw a photo of a quilt like this and decided to come up with the pattern and use those units in this quilt instead. The mystery was revealed a week ago and I like my version better so I am happy I followed my gut on this one.

Bonnie Hunter's mystery should be beginning next month so I have been clearing the decks to get ready for some power piecing to start. The colors have not yet been released but I am starting to think about what colors I might use, hope I can just raid my stash!


Saturday, October 17, 2015

More Antique Wedding Sampler blocks and a UFO

Back to my blue and white Wedding Sampler blocks. I am really getting to the end of these blocks and need to start prepping all the setting triangles. This is such a fun journey I am really sad to see it coming to an end.

Here is Block 19. This was a fairly simple block that was hand pieced and hand appliqued. I really enjoyed fussy cutting a stripe fabric for the star points but am a little disappointed that the points of the star get rather lost next to the blue print fabric. Oh well, still a fun block.

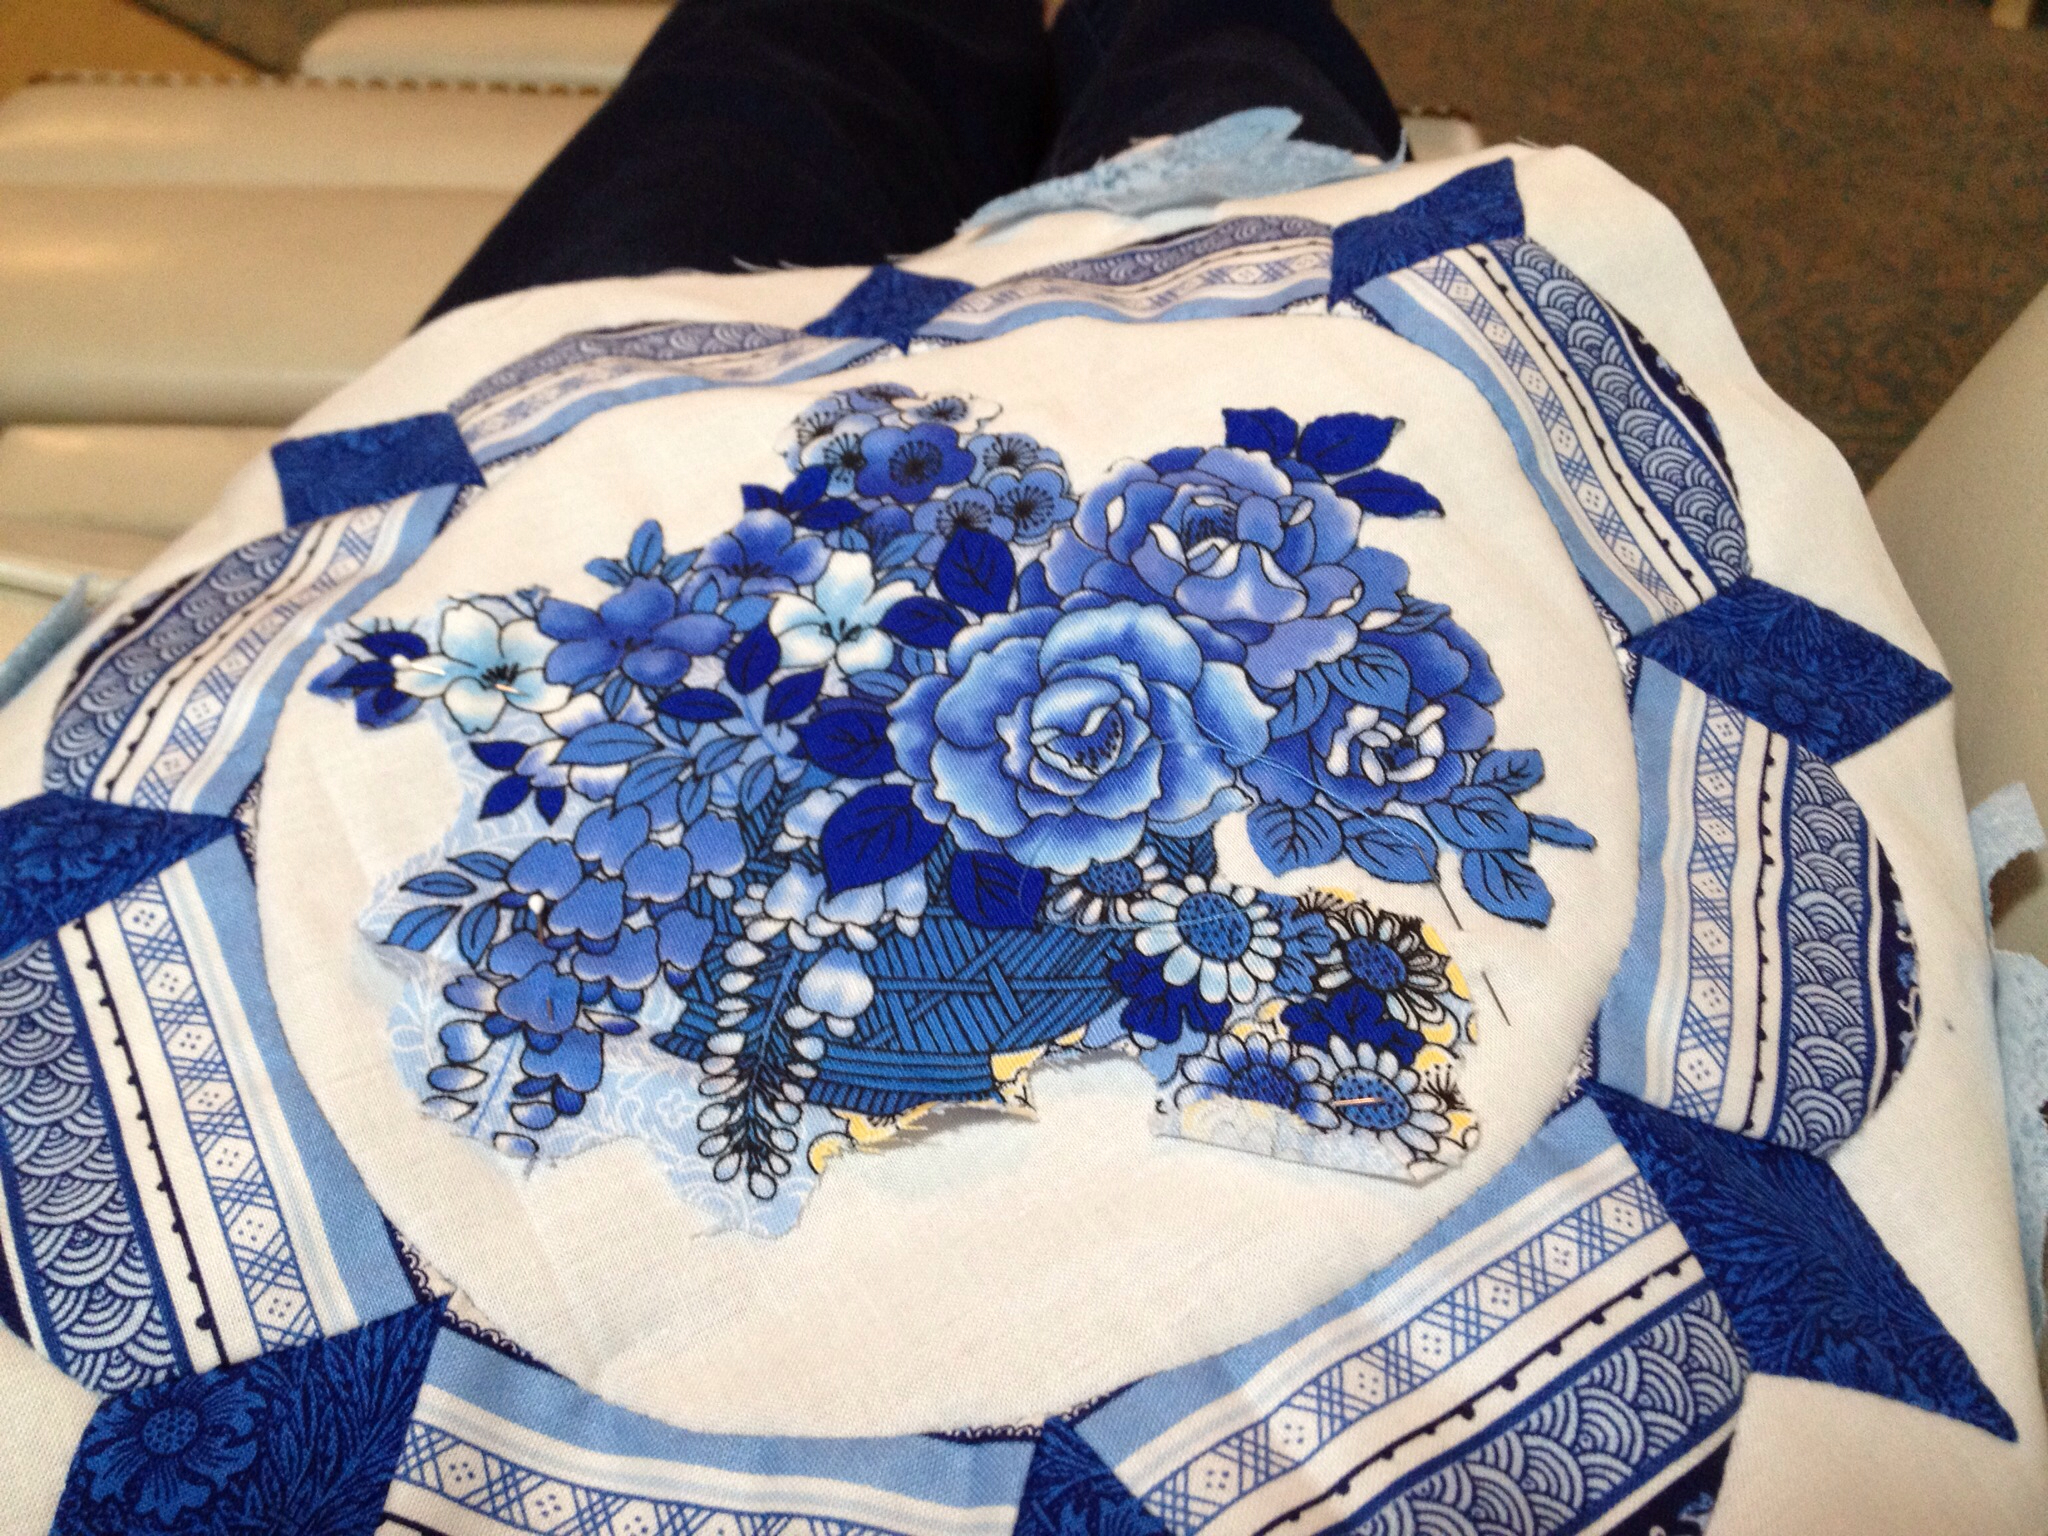
In Block 20 I again used a stripe print but this time not in the star points. This stripe is planned for the final border so I wanted to use it in at least one of the blocks. Not sure that it is quite as successful as I hoped but it will do. On the other hand I am very pleased with the Broderie Perse in this block.

I was a little concerned because some of this fabric had yellow in it that I need to eliminate while doing the appliqué as you can see in this photo. Another fabric that I am so happy to have in the front of the quilt as I think I may have enough of it to use for the backing.

Block 21. I did not enjoy doing this one! I hand pieced those tiny corner stars, 3" finished. The rest is machine pieced and hand appliqued. And when I finished I realized that the center Broderie Perse motif is oriented the wrong way. I think it is staying as it is!

Since I am getting towards the end I have been playing around with the block arrangement. Still not close to a decision here.

Because I am finished machine piecing the blocks on this project, I pulled out an old UFO which I am now calling Winter Blooms. I started this one about a year ago as a challenge to myself to use batiks. I had the appliqué and a few hourglass blocks complete and the cutting was done so in 2 afternoons I finished all the pieced blocks and arranged it on the design wall where it awaits completion. I keep looking at it to make sure all my blocks are arranged in the right way and have had to make many, many adjustments some of which were made after looking at these photos. I think I am almost ready to start stitching this together. There will be a small border of the teal around the appliqué which is being auditioned here.

With one more row added. My design wall and my mess!


Sunday, October 11, 2015

Quilt As You Go Hexagon Tutorial

This week a quilting friend showed me a fun little hexagon table topper that she made using a quilt as you go technique. She used some specialty rulers to make hers and I was intrigued to see if I could make some of these little hexagons without the special templates. So yesterday I pulled out some scraps and made this little tabletopper/candlemat.

Because I was just experimenting with the idea I just grabbed some old fabric but I think I may have to try this again in other fabrics and sizes, the possibilities seem endless and the best thing is that it is a great way to use up scraps of batting as well as fabric and when you put it together it is quilted and bound! As I was making it I thought it might be fun to share the technique in a little tutorial. I am sure this is not a new technique but it was new to me and it is really simple once you get the hang of it.

For each hexagon you need to cut three pieces. One batting, one inner hexagon and one outer hexagon which is also the backing of that hexagon.

The hardest part for me was to determine the sizes of the hexagons as I did not have the special templates. I decided that if I made the outer hexagon 1" bigger all around the smaller hexagon this would be about right and would work with the Hexagon ruler I had. This is the Hexagon ruler by EZ but I believe there are several similar rulers available. I decided to make my inner hexagon using the 2 1/2" marking on the ruler as seen here. You will need a hexagon of batting and one of fabric at this size. These may be cut from scraps or 2 1/2" strips.

The larger hexagon is cut at the 4 1/2 marking. Do not cut squares first as they will not be large enough but a 5" charm square would work or you could cut a 4 1/2 strip of fabric and get several from the strip.

The three pieces need to be layered with the large hexagon wrong side up and the batting and small hexagon in the center. The small hexagon should be right side up and it is important that these be centered. I just eyeballed it but you can check to make sure it is 1" on all sides if you have difficulty keeping it accurate.

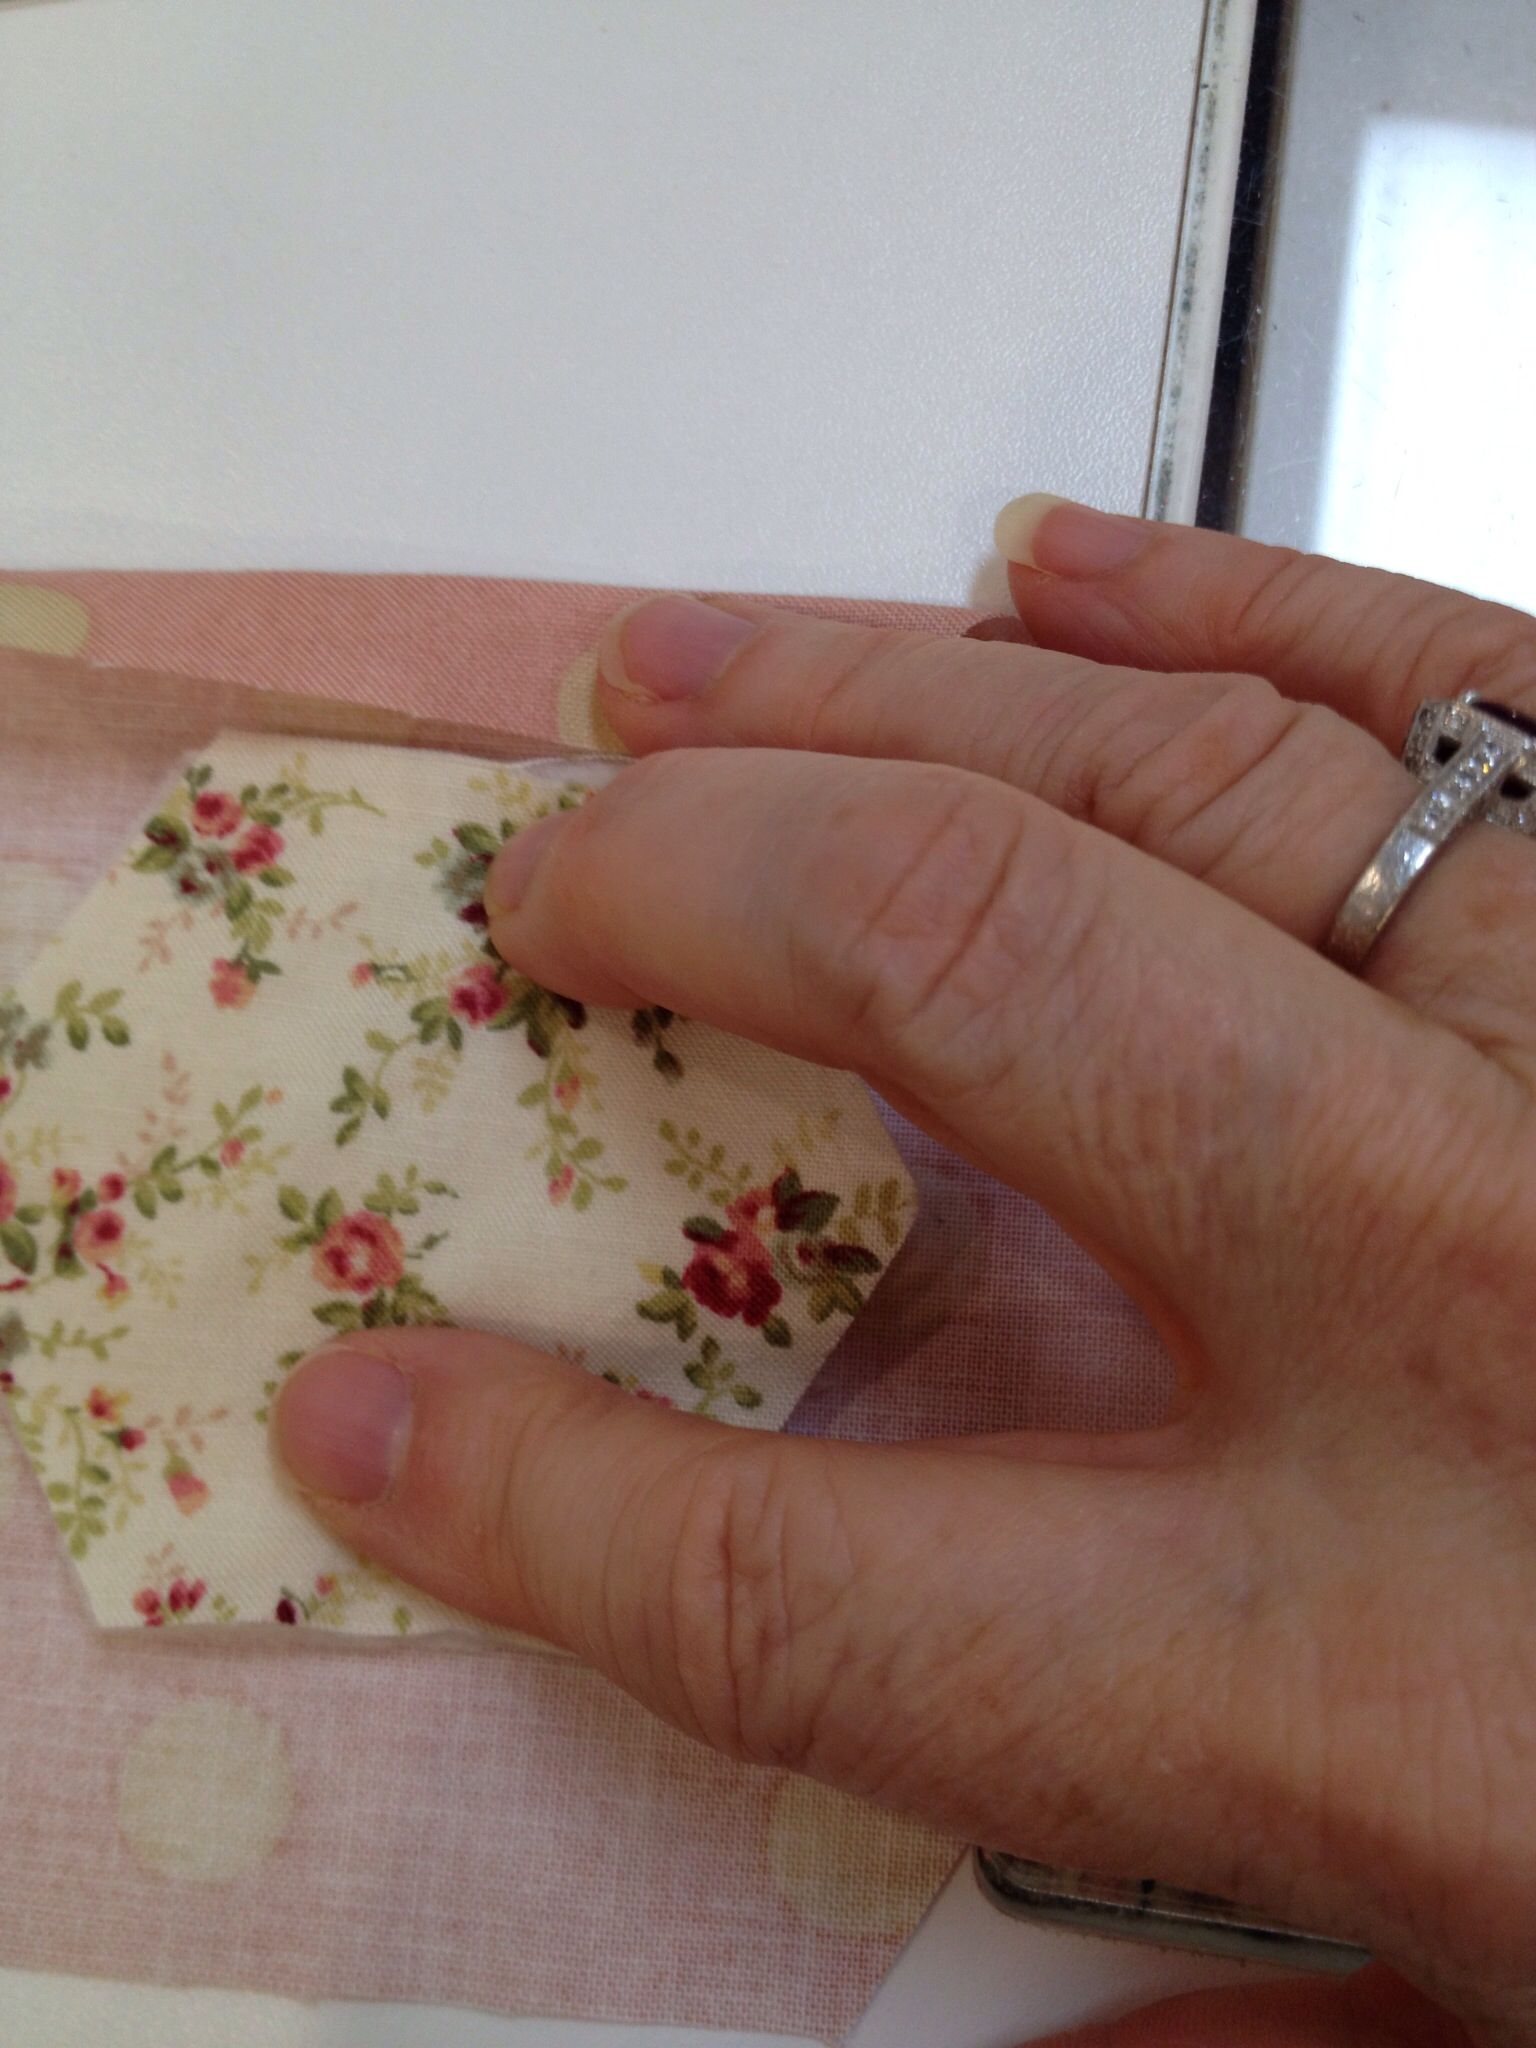
Starting on one side fold the outside edge in to meet the batting.

Then fold it over the edge like a binding and pin.

Go to the next side and do the same making sure to match the miter at the corner. Because I am left handed it seemed easiest to do this clock wise but when stitching I realized that it would have been better to do this counter clockwise so I will try that next time.

Go all the way around pinning each edge. Now it was impossible for me to photograph this little tricky bit so I am going to try to explain. If you look at the photo you will see that all of the miters go in the same direction. If you just go around the hexagon you will find that your last miter is folded in the opposite direction which I suppose is fine but it bugged me. To fix that when I was folding the last side I unpinned the firt side and unfolded it so that is could refold them correctly. Really this is much easier that it sounds and hopefully makes sense when you try it. Anyway here is how it should look at the end ready to stitch. It looks weird and distorted but that is just from the pinning.

Because I was trying this out using these rather shabby chic fabrics I thought it might be fun to use a decorative stitch to sew these but certainly a straight stitch would be fine. Lots of opportunity to be creative here.

Once I had made several I laid them out ready to stitch together.

I forgot to take a photo but I stitched them into vertical rows first and then stitched the vertical rows together using a zigzag stitch.

And here is the back.

Quick easy and fun!


Saturday, October 3, 2015

Some quilting, some embroidery and some blue and white

Another road trip is behind me and I am finally back to some fun stitching. This was a trip to check in on DH's aging parents and all I can say is that I am so happy that I have my sewing to keep me going during these times! This trip I worked on this little embroidery, Welcome Home by Kathy Schmitz. The original embroidery was done in all black but I decided to add touches of teal to go with the border fabric. I ended up hand quilting it and think it is sweet on this little stand.

I have also been working on the hand quilting of Mountmellick, the Quiltmania mystery quilt by Di Ford. I ended up doing an echo quilting for the background fill. I was originally planning a crosshatch but decided I didn't feel like marking. Hmm, now to decide how to do the first border.

And I have completed a few more of the blocks for the Antique Wedding Sampler by Di Ford. Here is Block 17.

And Block 19. I was thrilled to be able to find a place to use this Asian toile, I love the pagoda style building. I think those little butterflies need to antennas added.

Today I finished the last machine pieced block in the quilt, Block 23. Unfortunately there were a few errors in the directions for this block. Two of the templates were marked with the wrong dimensions and the layout diagram was incorrect for one of the HST units. Fortunately I figured out the measurement issues as I was figuring out the rotary cutting measurements but sadly did not notice the incorrect HST unit until I showed it to DH who noticed right away that the block looked weird. Oh well, all fixed now.


Thursday, September 24, 2015

Back to the Blue and White

Seems like forever since I have worked on my blue and white version of Di Ford's Antique Wedding Sampler. But sometimes that is a great thing because when I finally got back to it this week it felt like a brand new project and I have been making great progress. I am one of those people who find it impossible to work on just one project at a time and being able to bounce from one to another sure keeps things interesting. Anyway, I picked up this project right where I left off and here is Block 13. I hand pieced this one and then added the broderie perse. A fairly simple block but the broderie perse really brings it to life.

Block 14. Another one of my favorite circle blocks from this quilt. The starburst is hand pieced and then appliqued to the background. Then some fussy cut circles in the center and leaf shapes around the outside really come together in a great block. The hardest part of this block was selecting the fabrics!

Here is Block 15. Whew, piecing this one was like making a complete miniature quilt but, since I was in a piecing mood the day I made this one, it was a perfect project. This was machine pieced and rotary cut, really wish the pattern included the instructions for machine piecing but I guess it just adds to the challenge!

And Block 16. So hard to pick a favorite of all these blocks but I do love this one. I am trying to incorporate as many different broderie perse shapes as I can and was excited to find these little fan like flowers. I think they add a little Asian influence to go with the look of Chinese blue and white pottery.

Fabric selection continues to be the most challenging part of this project. I find it is easiest to think of each block as its own little quilt making sure that the blues within a block coordinate well. For a block that includes broderie perse, I try to select the motif first and then build the other fabrics around that. Of course, I love to add a bit of fussy cutting here and there to add extra interest to the block. Here you can see Block 17 in process. The diamonds and little circles are fussy cut and the colors were selected to enhance the broderie perse rose.

And finally I try to balance the colors in the whole quilt by keeping all of the blocks up on the design wall and taking plenty of photos for reference. Right now I am starting to think about the sashing fabric(not sure about this one), setting triangles and final border and, because I am over 1/2 way complete, need to make sure to start repeating fabrics to keep things cohesive. What looks pretty haphazard to many is actually quite a challenge to keep balanced and pleasing to the eye! Well, here is how the design wall looks right now. The blocks are not arranged in any order but I think it is coming together well.

On to stitching block 17!


Wednesday, September 16, 2015

Mountmellick is a finished top

Whew, back from our trip to Oklahoma to move our son and The Texas to visit family. All went well and I have spent the last several days trying to get back into the routine of things and trying to get motivated in the sewing room. Though I was feeling the urge to start on something new, I resisted and put on the borders for Mountmellick, the mystery quilt by Di Ford that was in last year's Quiltmania magazine. I am so glad I did as I love how it turned out.

Part of what took so long is that I couldn't use as much of the strip as I wanted as there were not enought full repeats of the pattern to cut it the way I needed. So after much deliberation and advice from quilting buddies, I ended up just using the darker portion of the stripe. Turns out that was the perfect solution, but in future I guess I better check the stripe repeat before getting my heart set on how I want to use it.

Next up, the hand quilting. I am trying a wool batting for the first time and my LQS only had Quilter's Dream Wool in the size I needed. Seems a bit puffy so far but hopefully once I add the fill around the appliqe I will like it better. Still deciding between echo quilting or grid work as the fill. I like the look of grids but hate the marking and stitching. I love doing echo quilting though so it may win out once again!

 
I did get this month's Quiltmaker bitty blocks done. These finish at 4" and were a fun way to get back to my machine and use up more of my scraps. This will end up as a cute row quilt at the end of the year and hopefully I will see a dent in that scrap basket by then!

Finally, you may remember a quilt, Science Fair, that I finished quilting a few months ago. It was draped across the bed in the room that our son was expected to live in at the end of the summer. However he was only here for a few nights before moving to his permanent job and I had forgotten to remove it from the bed when he arrived. He saw it in the room and said how much he liked it. The next day he sheepishly hinted that he would like to have it to hang in the office/sewing room in his new apartment and I was thrilled to gift it to him. After all, isn't that the best purpose for our quilts, to surround people with our love. I was delighted to get this picture of the quilt hanging in his room, haha, a constant reminder of mom!


Wednesday, September 2, 2015

Two Halloween finishes

Whew, it has been a busy week of stitching and I finished both Halloween quilts in time for the grandkids to enjoy them for the season. Good job as moving our son jumped forward a week and with almost no notice an apartment became available for him one week early. So we load a truck today and head out tomorrow for the long trip to Oklahoma. But following his move we are going to Dallas to spend time with family and I get to visit my SIL who is my long distance quilting buddy! Hmm, maybe I can sneak in a little quilt shop therapy.

Back to the sewing. Here is the finished top for my granddaughter, a cute little wall hanging that was in the fall 2010 Quilt Sampler magazine.

I had fun playing with the quilting in this one. Since it is for Halloween, I liked the look of the jagged frames around the blocks and it was fun doing random spider webs and spiders. White thread on black is pretty non forgiving but I have decided it just goes with the scary look.

The lighting is weird with this one. Why is there no quilting showing on the bottom? And what happend to his legs?!

I searched for a pattern for my grandson's quilt but couldn't find anything that struck me,so came up with this design. Inspired by a quilt done by my SIL, I just cut random width of fabric strips, sewed them together and then inserted a strip and added some fun appliqué. I gave it to him last night and he loved the spider and bats, especially since "Grammie is afraid of bats".

I just quilted it simply, an all over loop and stars in the pieced section and a little swirl/star filler in the solid grey.

Not perfect but finished, my new motto!