Friday, February 27, 2015

Finished Squirrel block and prepping a fish

I have finally finished the squirrel and strawberry block for the Rachel Meyer quilt. So happy to be finished with all those tiny strawberry caps!

The original quilt has lots of embroidered details and while my adaptation is by no means a faithful reproduction I do try to add some embroidery in each block. In this block I embroidered all the strawberry stems in a tiny chain stitch using 2 threads of Valdani variegated embroidery floss. It comes in a little ball and has only 3 threads rather than the usual 6 threads of embroidery floss. I have used Valdani whenever possible in this quilt as I love the depth of color in the hand dyed threads. The squirrel's eye has been embroidered using an outline stitch in one thread and a French knot.

Since it has been a long while since I shared the beginnings of this quilt I thought I would show a little of the next block being prepped. Several people have asked if this quilt is begging made from a pattern. It is not a pattern exactly however I am using the "pattern" for the quilt that appears in the out of print book American Graphic Quilt Designs by Dolores Hinson. Here is a picture of the pattern for the fish block.

The book includes these drawn templates for each block and a tiny illustration for placement. Unfortunately the templates do not always fit in the block when the placement is made so I must evaluate each one to determine if the piece needs to be reduced, enlarged or remain in the original size. Some blocks require very little adjustment but others involve significant changes. A bit challenging but not too bad once I realized that I needed to pay attention to size before cutting fabric pieces. So when I start a block prep the first thing I do is take a copy of the template drawings and then do my size adjustment on the copier in my sewing room. In this block the bird and the upper interior flowers needed to be reduced

The next step is to select fabric possibilities for the whole block. Here are the fabrics I selected for the outside flowers. I ended up making a few changes in the final flowers but since I have so many different fabrics pulled for this quilt it helps if I make some choices before I start cutting.

My prep method is very simple. I cut the template shapes from the copies I made, trace around them on the front of the fabric using a Frixion pen and cut them out using about a 1/8" seam allowance. I do use a sandpaper board when tracing the template as it helps to hold the fabric in place. Once a few pieces are cut it take them to my light box to be glued in place. In this quilt the light box is not necessary as I am not using a full size placement pattern but if I did have the pattern the light box makes placement easy. In this quilt I lay out by sight and usually fold the background into quarters to give me center lines for guides. Here I have laid out the circle and made sure the fish, bird and flowers fit inside before gluing everything down with tiny dots of Roxanne's basting glue. I did alter the fish slightly as it is only one piece in the original quilt. I couldn't resist changing one fin and the tail to separate pieces so I could take advantage of the printed fabrics.

Next were the outer flowers and leaves. The original quilt has a bit of a crowded feel so I decided to use the flowers and leaves at the original size. Once everything is glues down I drew in the stem details and birds feet ,using a Frixion pen, to be embroidered after the appliqué is complete. Finally after about 4 hours of work this block is ready to stitch.


Tuesday, February 24, 2015

Stonefields Part 5

This week I have had some fun working on my Stonefields quilt. I really do enjoy working on this quilt and have been pacing myself. This is one quilt that I want to savor so I fit it in as a reward between other projects. Once I finished the appliqué work on the Rachel Meyer squirrel block with all those tedious strawberries these Stonefields blocks felt like a treat.

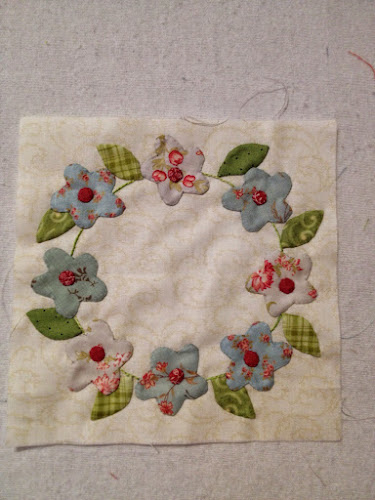
Here is the wreath block that will end up in the center of the quilt. I am a little nervous that the light flowers won't show up so I will be keeping an eye on that as I continue.

Since there are no directions in the pattern for machine piecing, these blocks were a little tricky. I ended up piecing the center with just the square, 4 rectangles and the triangles which I then squared up to size before adding the outside triangles. Certainly they could be easily hand pieced but I enjoyed the challenge of figuring out a way to make this work using rotary cut pieces.

These Dahlia blocks were really fun. I love using all these floral and paisley fabrics together and I love searching for the perfect center circle fabric.

Again I decided to machine piece these blocks. Lots of fun selecting fabric combinations. The pink frame around the roses is made from fabric that is at least 20 years old. Lots of practice making mitered corners on these blocks!

This Lollipop block was super fast and easy. I noticed that the quilt need some touches of darker fabrics so I added darker green leaves and those dark teal stripes.

One of the hardest parts of this quilt, for me, is trying to make sure that I am maintaining a good balance of colors and light and dark shades. For this reason I try to have all the finished blocks on the design wall in front of me as I prep each block. That is the main reason that the center star of this wreath is beige color, I feel like I need to add a bit more of the neutrals in upcoming blocks. But I also like how fussy cutting these diamonds makes a secondary design.

Lots of the hexagon rosettes are finished too, I think I have half of them ready!

And speaking of half, here are about half of the Stonefields blocks up on the design wall.

Until next time, happy stitching.


Wednesday, February 18, 2015

Feeling squirrelly

Well actually I have been feeling like I am in a bit of a quilting and blogging slump. My days have been filled with family and friends so not as much sewing has been going on the past few weeks. I have however made a little progress on the Rachel Meyer quilt. This squirrel and strawberry block has been quite challenging. Not because the sewing is difficult but because my first circle was undersized and I had to play with sizing to make another. And those 50 strawberries get so boring! Oh well the end is in sight.


Thursday, February 5, 2015

2 New Quilt Alongs

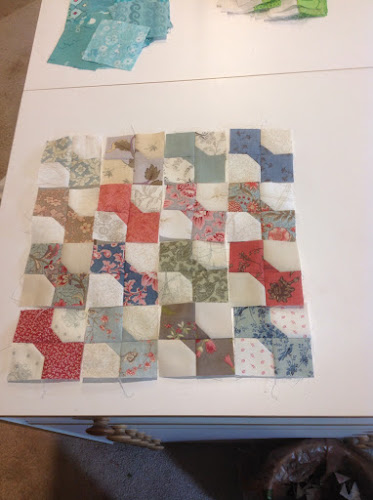
Despite my goal of resisting new projects, I have succumbed to 2 new quilt alongs. The first is the Bitty Blocks Quilt Along from Quiltmaker. This is a great way to use up little scraps as the blocks are either 3 or 4 inches and as I had several small scraps left from my French General Scrappy Trips quilt as well as my Stonefields quilt I figured it would be a great use of those scraps this year. The final product will be a row quilt but that is all the info that has been released so far. January's blocks were these cute little 3" bow ties and I got the 16 blocks made in an hour or so.

February's blocks are tiny little baskets. The instructions were to make 14-18 of the blocks so I hope 16 will be enough. These 4" blocks were much more time consuming but once I got into the groove were pretty fun.

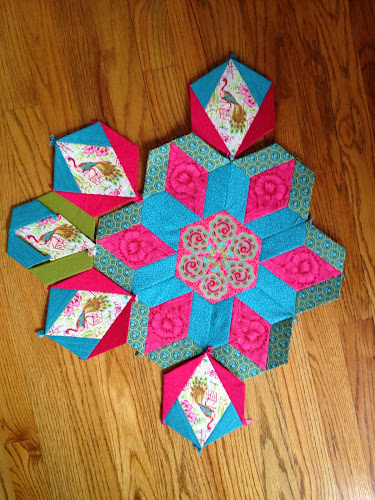
The second project is The New Hexagon Millefiori Quilt Along by Katja Marek. The blocks are based on her book The New Hexagon and after lurking on the Facebook Group for a month I decided to give it a go. In order to participate you do need the book. The necessary papers are available from Paper Pieces but I amd just making copies of the blocks onto card stock and cutting my own papers. It would be much easier to have the precut papers but since I already had the card stock I figured I could save a bit of money by cutting my own. It really isn't that bad so I think I will just continue in this way. The challenge of this quilt is really in the selection of the fabrics for each round. I am not sure that I have enough contrast in my fabrics but hopefully it will improve with the next round.

I love the opportunity for fussy cutting and am pleased with my center. I started with the fabric with the peacocks for my color scheme but really have no idea where I am going with this. The pieces are much bigger than any EPP I have tackled before so I am using way more fabric than I expected. Looks like this will be another great stash buster!